
Above: The real rudder and Hermann Graf at Wiesbaden-Erbenheim, "home" of JG 50, in September 1943. Below: Thomas Bautch's excellent replica.
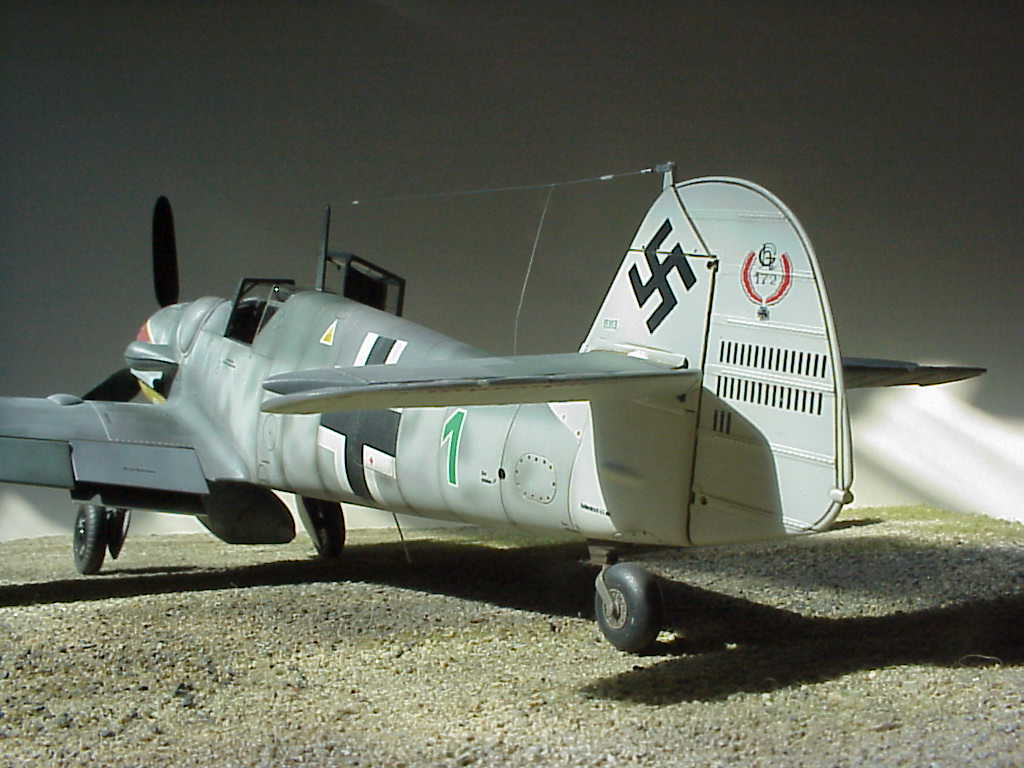
Thomas Bautch sent the following account of the methods that he used to create such a fantastic model:
"This Bf109 is the 17th that I have built, I had been wanting to do one of the G-6's with the tulpen nasen for some time, and then I saw your request of a couple months ago for models of the Graf and Grizlowski planes so I got the Eagle Cals sheet and began work on this model. I used the beautiful MDC interior, it fits perfectly and has the best detail of all those that I have seen. The only criticism I have is the seatbelt attachments, they aren't quite accurate but I used them anyway. The only additions I made to the cockpit were the grab handles on the forward canopy, the canopy release lever, and the retaining cable and spring. I used the usual techniques of paint, future coat, dark wash and drybrushing to finish the interior.
The balance of the model was built quite normally, with
a few enhancements. I cut the top of the landing gear covers off and fashioned
new ones out card stock. I also added the retraction rod and support to the
upper cover portion. I made the flexible part of the lower brake line from
a piece of wire wrapped with a thin strip of masking tape. I thinned the exhaust
shrouds and enlarged the cooling vents on the cowl. The elevators were cut
apart and repositioned slightly, and exhausts, machine guns and pitot were
drilled out.
The Wgr 21's presented a bit of a problem since I had
no drawings or plans to work from. I did locate a couple of photographs and
I had a set from a 1/48 kit that I used for the approximate dimensions. I
had some plastic tube of the right diameter and fashioned the attachments
struts from plastic rod and tubing.
For the painting, I used Gunze-Sanyo RLM 74, 75, 76 for the camouflage and
flat white and RLM 04 for the tail and cowl under side. The "step"
pattern on topside of the flying surfaces was done by cutting the design out
of frisket paper using the pictures provided in the decal set. The side mottling
was done free hand, again using the Eagle Cals provided profile and photo
as a guide. Next, I applied several light coats of future and applied the
decals. These went on very nicely except for a problem with the tulip nose.
I had a problem immediately with the white sections, I couldn't get them to
conform to the nose contours and the started tearing around the scoops and
other protuberances. So I cut out the center portion leaving only about 1/8
inch of the outside of the decal. Then I did the same thing with the yellow
sections. After this I put a couple of coats of future over the decals and
masked and painted the red portions. This worked out quite nicely and allowed
a perfect match for the spinner color. Following the decal application I used
a wash of Model Master enamel burnt umber to accent the panel lines. I then
used a very thin mixture of brown and black ( about one drop of each brown
and black, five drops of clear and about 60 drops of thinner) to gradually
built up exhaust staining and weathering.
I used invisible thread for the antenna, colored silver
using an marking pen. The rear attachment to the fin post is made from a thin
strip of aluminum from a soda can cut and drilled appropriately. I added the
tensioning spring and the insulators are actually sections of insulation stripped
from a small diameter wire."
Click here to go to first page with photos of Thomas Bautch's beautiful Graf JG 50 Bf 109 G-6.
We express out gratitude to Thomas Bautch for submitting these photos of his model, and we invite others to send us more photos of their Graf or Grislawski models. E-mail your suggestions here.
More by Christer Bergström -
the detailed history of the air war on the Eastern Front 1941 - 1945:
Black Cross/Red Star: Air War Over the Eastern Front